How to quickly take a screenshot and send it to another user
But if you need to send a screenshot to another user, and even pre-specify comments on it, for example, any instructions, then this standard method not very convenient.
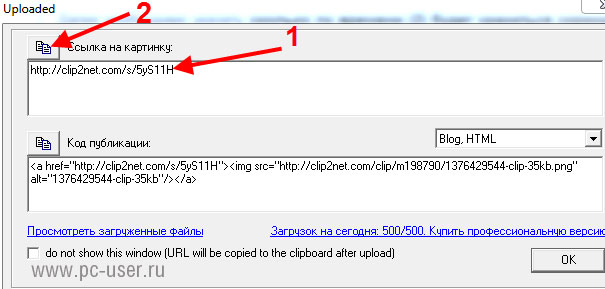
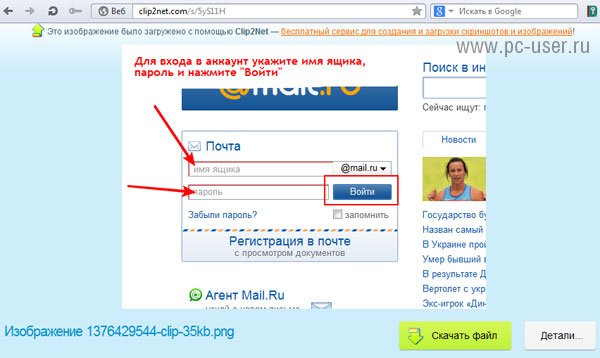
It is much easier to take such a screenshot using a special program (service) and send the user not the picture itself, but a link by which he can view it.
As a result, you do not need to run programs to create / edit a screenshot, you do not need to upload a picture to the Internet or send it by email - all this fast done with a single program.
One of these services is clip2net which will be discussed in this lesson.
I have been using it for more than a year now and now I can’t imagine how I can do without it when I need to quickly send instructions to the client, comments to the designer, etc.
As a result, a lot of time is saved, and if you often have to work with screenshots, then I recommend this service to you.
How to work with the clip2net service, see below in the video and text version of the lesson.
Text version of the lesson.
Stage 1. Registration.
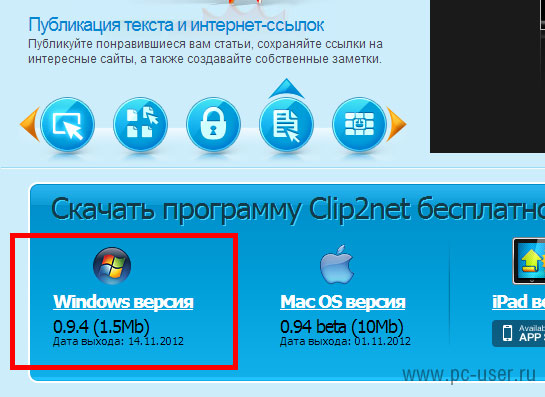
Download the program from clip2net official site and install it.
The installation is normal, so we will not consider it here.
After installing the program, we return to the site, go to the tab "My files" and register:
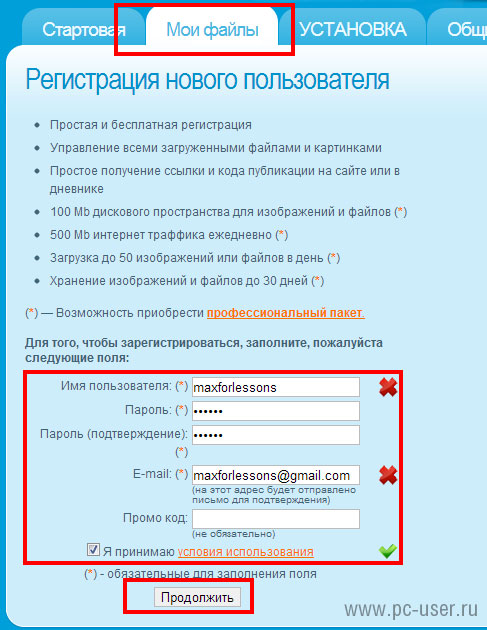
Registration is free, and it gives you more options in working with this service.
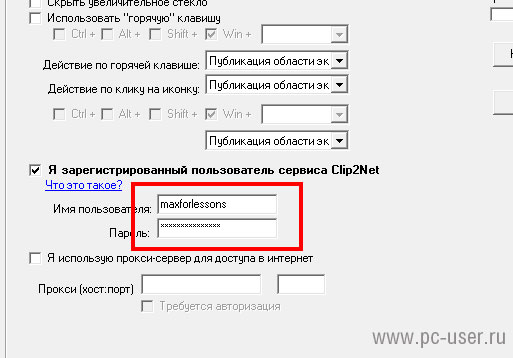
Now let's log in to the account in the program itself.
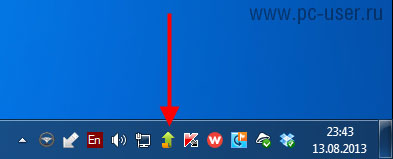
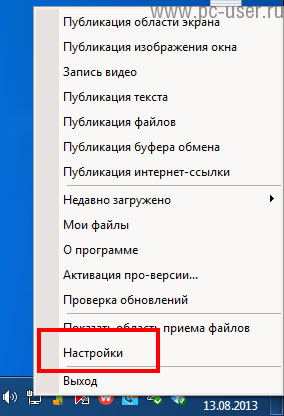
To do this, right-click on the program icon in the notification area and select "Settings":
In the program settings, specify the username and password:
Now we can use all the functions to work with screenshots.
Stage 2. Create and send a screenshot to another user.
To make screenshot press left mouse button by program icon:
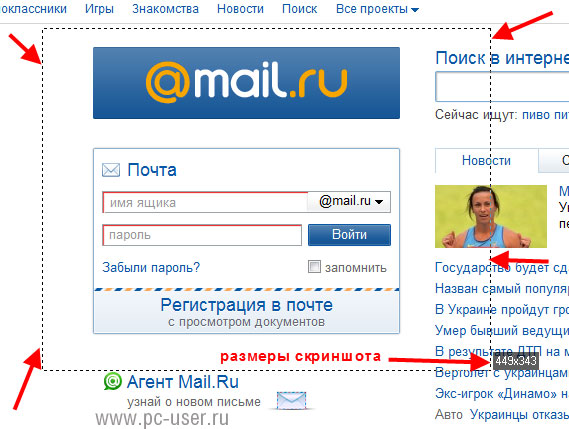
The area is shown by arrows.
The size of the screenshot is also displayed on the right. (449x343).
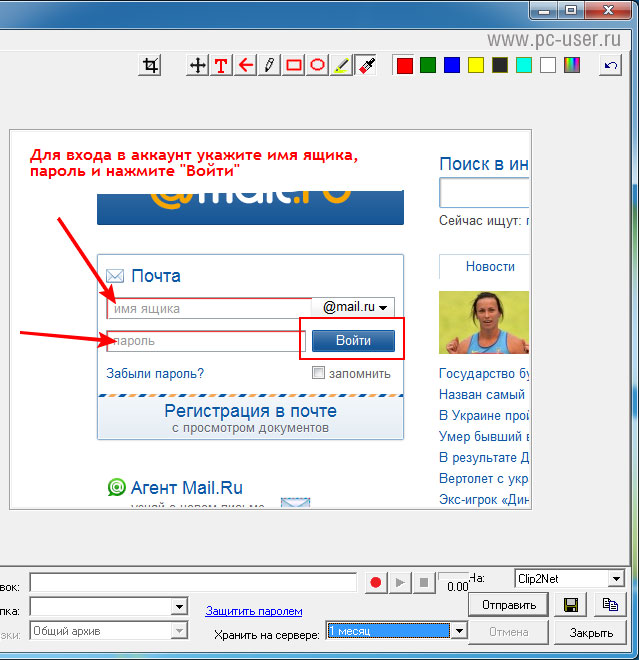
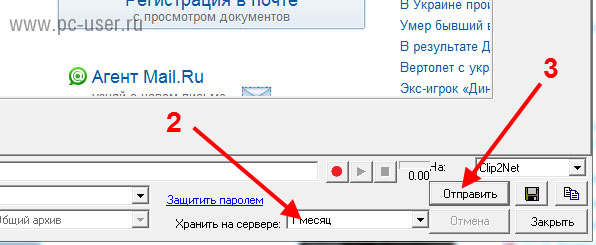
After selecting the area (when we release the left mouse button), a window for editing and publishing a screenshot appears:
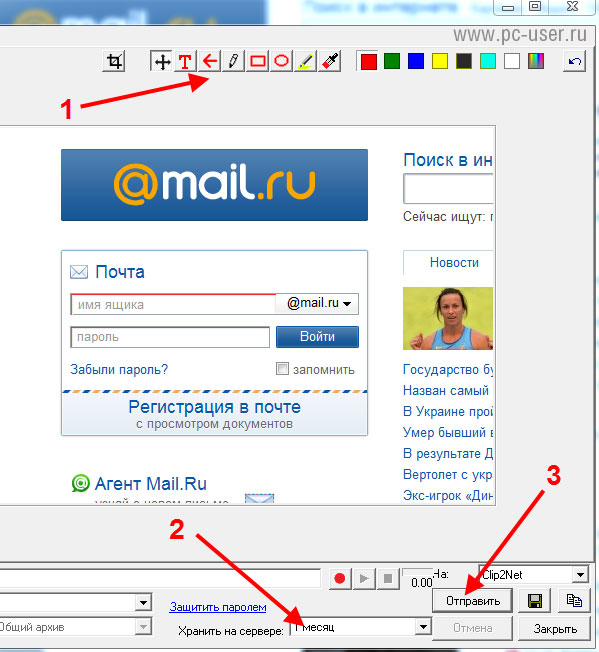
Here, using the tools (1), you can add comments, highlight the necessary elements, etc.
For example, like this:
This is how the clip2net program and service work - everything is simple and fast, and most importantly, there is no need to use special programs to create and edit screenshots.
If you still have questions about working with this service, watch the video tutorial above.